
This handout was written for people who have attended one of my workshops, rather than as a substitute for coming in person. Much of this material is visual. Here are reminders.
Ergonomics For Musicians, The Small Muscle Athletes
“But then who, looking at a hand, would say it was made to do easy work? You can see from the look of it that it is meant to do difficult things, that it is the noble, willing servant of the heart and mind.” – Ursula LeGuin
General Principals
Pain is not an early warning system!
When you feel pain, it’s because tissue damage is occurring. Change positions or stop.
Seek Comfort and Efficiency: Just because something is familiar does not mean it is comfortable. Listen to your body, not just the sounds your instrument makes. Be kind, not harsh.
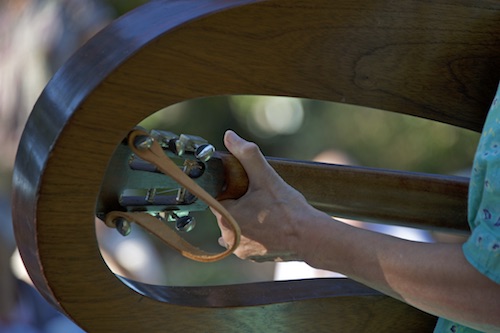
Use large muscles for power, small ones to guide. HANG your fretting hand. Use gravity! Use the weight of your arm to power your picking; use hand muscles mainly for guidance. Use gravity and the weight of your upper arm to get the strings against the frets. Just hang your fretting arm from the shoulder like a little kid trying to pretend they’re asleep…
Garbage In; Garbage Out
Go Slow: Go too slowly to make mistakes.
Relaxed good form: You can’t get a new body! Learn details safely now, so you don’t risk a repetitive motion injury later. Such injuries can take years to show up.
Practice doesn’t make perfect. It makes permanent.
Study vs Practice: First study, examine, explore, decide. Focus on smaller and smaller details, including the gestures that get you from note to note or between chords. Then repeat till your body remembers.
Study before practice: Each time you push down on a string should be a brand new experiment. Where is your elbow? How is your “Queen Elizabeth Wave” angled? Are your fingers in the sweet spot right up against the fret? You shouldn’t repeat any gesture until you’re sure it’s the one you want to keep: Only practice the gestures you want to keep.
Short practice sessions: No more than 5 minutes of new material at a time. Max 6 repetitions. (You can Study for longer, but focus while you’re fresh. Stop immediately when you’re tired.)
Yawn: deeply and constantly to stay relaxed and improve focus. (Really – it works!) Your body has two autonomic nervous systems, the sympathetic and the parasympathetic. The sympathetic system does “fight or flight” adrenaline release. The parasympathetic does restorative processes, digestion, and clears excess adrenaline from the body. Too much adrenaline makes thinking difficult. You can trigger the parasympathetic response by yawning. “Chain yawn” for 20 – 40 minutes right before you get on stage, to ward off stage fright.
Specifics
Whole Body: Balance on two feet and your spine as a tripod when sitting. Knees, hips & elbows at about 90 degrees. Keep your chin in. Try not to look at the strings. Practice in the dark to avoid straining your neck. Don’t lift any of the weight of the guitar with either hand, (though leaning your right arm on the guitar is fine).
Neck Up: There is an excellent guitar support available called the “neckup.” You can also use a big chamois skin draped on your lap like an apron. With the NeckUp, don’t store it with the suction cup in contact with your guitar. Take off the cup when using if the temperature gets above 80 degrees. This is because the cup could damage the finish on your guitar. You can visit their website, here.
(Violin Valet can be useful for fiddlers)
♫ Keep your wrists in neutral every single moment! To find neutral, clench your fist hard, check your wrist position, and relax. This is neutral, not bent in any direction. Now bend your squeezing wrist and s-l-o-w-l-y begin squeezing again. Stop the instant it gets uncomfortable. Tilt your guitar up. Move your back and shoulders (and guitar!) for barre chords to where you can “kiss the strings.” Watch to keep your wrist straight – not just while you’re fretting, but between chords too. For barre chords you’ll need have the neck up almost to shoulder height; drop your shoulder and move your elbow towards the mid-line of your body and out in front of you, to support your hand and avoid a wrist bend.
Fretting Hand: Crawl your fingers from chord to chord. Find pivot fingers that stay on the same string wherever possible and leave it in place. Relax completely between every chord.
Fingers really close to the frets: Fret the low E string in 3 locations: FIRST exactly half-way between the first & second frets, THEN just barely above the first fret, and FINALLY right behind the second fret. Explore how hard you have to push to avoid buzzes in each spot. Don’t ever push any harder than needed to get the strings firmly against the frets.
Queen Elizabeth Wave: Notice that you can make this gesture without bending your wrist! Your bent fingers won’t spread side to side, but can reach far apart by spreading front-to-back. Use this rotation as part of figuring out a new chord, or the journey between chords.
Propriaceptive Pushups: Set up a new chord with perfect form before adding pressure at all. Now hang briefly and firmly, and release pressure without losing contact with the strings, using a single staccatto strum. Watch your form! Do no more than six. Shake your hand out. This is to program your hand, not to build strength, so don’t add any more pressure than needed. Crawl back and forth between two chords, no more than six times, keeping your wrist straight.
Tapping game: I learned this one from the brilliant ukulele player and teacher James Hill. Touch your knee with your fretting hand. Now find your new chord. Take your time to get it perfect (Fred first, sweet spot, wrist rotation, elbow placement for straight wrist). Repeat tap and placement till you can find it reliably. Now do it in rhythm. Count slowly to eight. Strum only on “One.” Tap your knee once on “Two.” Spend the rest of the eight counts finding the chord again. Repeat, tapping on Two and Three. Repeat, tapping on Two, Three & Four. Repeat tapping on Two, Three, Four and Five. Etc. Slow down your count. Stop when you can’t get to the chord in time. Come back later (next practice session) and try it again. You’ll get further each time.
Loose joints: If some of your finger or knuckle joints tend to flatten out or bend a bit backwards as you play, pay careful attention and try to avoid this. If you just can’t keep them from collapsing, or if you’re double jointed, see an occupational therapist for a Silver Ring Splint for protection for those joints. Be sure to ask if the therapist will prescribe ring splints for prevention before you visit. Some will not prescribe till you are in pain! The splints are beautiful, comfortable and effective. For the name of the nearest provider, contact the Silver Ring Splint Company at 800-311-7028. Tell them “thanks” for me. Canadians can contact Digisplint.
Picking Hand: Stick out your thumb as if you were hitchhiking. “Grate cheese.” (Try really grating some on a grater, or a carrot. Notice your wrist position. Pretend you have a cast on.) Move big from the elbow and shoulder. Relax, relax, relax.
Don’t touch the face of your guitar: If you already have the habit of resting your pinkie, find the perfect rubber band to link your pinkie and ring finger. It should be loose enough so you don’t even feel it when your two fingers are side by side, and heavy enough that the pull reminds you when you extend your pinkie towards the guitar face.
Strumming: Drag the back of your fingers across all or some of the strings, using a movement that starts at your elbow. Keep your wrist straight. Use the fronts of your fingertips to strum back up.
Picking: Wave “hello” to your guitar. Move your finger towards your wrist, not your palm (you probably won’t be able to reach your wrist, but move in that direction).
Your Thumb is a piece of meat! Try to move from your elbow rather than using that little fat muscle at the base of your thumb. It just isn’t big enough for the job! Use that muscle for guidance, not power.
Athletics
Warm Up First:
Your body produces a quart a day of lubricating fluid. Use it! Just spread lubricating fluid; DON’T STRETCH. Gently wiggle fingers, rotate hands, flex elbows, shrug and roll shoulders, raise top back of head (with chin tucked in). Yawn.
Breaks Every Five Minutes: Shake out hands and arms gently. Shrug deeply. Roll shoulders. Stand up and walk around. Lift back of head. Yawn.
Stretch Afterwards: Stretch as far as comfortable, and no further! This is not to prove how flexible you are: It’s to find out. No bouncing. You can injure yourself stretching! Hold each stretch 15 – 20 seconds (one good yawn!). Your muscles should relax as you stretch. If not, ease off. Try stretches from the great book Stretching by Bob & Jean Anderson.
See if Your Library Has: The Healthy Guitarist by Virginia Azagra Rueda.
© 2019 Flip Breskin